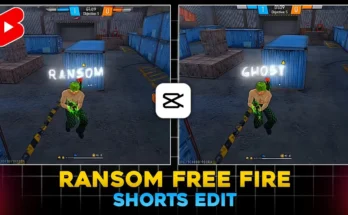
How to Edit Next-Level Montage Videos in VN App (Step-by-Step Guide)
Hey guys, welcome back! In today’s tutorial, I’ll show you how to create next-level montage video edits using the VN Video Editor App. Whether you are editing gameplay clips, Instagram reels, or cinematic montages, this guide will cover everything you need:
- Cutting clips according to beats
- Adding slow motion at the right time
- Syncing clips with music beats
- Using effects and transitions
- Applying professional color grading
So without wasting time, let’s get started!
Step 1: Install and Open VN App
First, download the VN Video Editor app from the Google Play Store or App Store. Once installed, open it and click the “+” button to start a new project. Select the video clips you want to edit (for example, your gameplay footage).
Step 2: Select the Best Clips
Go through your footage and keep only the best highlights—such as one-tap kills, headshots, or action moments. Use the Split tool to cut unwanted sections and delete unnecessary parts. This helps keep your montage clean and focused.
Step 3: Add Music and Sync with Beats
Editing without music feels incomplete, right? Choose your favorite background track by importing it from your device. Once added, use the Auto Beat Marking feature in VN App to automatically detect beats. You can also manually adjust if needed. Make sure your clips align with the beats for maximum impact.
Uppbeat and Epidemic Sound are great sources for royalty-free music you can use in your edits.
Step 4: Add Slow Motion
Slow motion makes your montage look cinematic. In VN, click on a clip → choose Speed → select Custom. Add a keyframe right after your one-tap shot or highlight moment and lower the speed. This creates a smooth slow-motion effect exactly when the action happens.
Step 5: Apply Effects and Transitions
Now, make your video more dynamic by adding effects. For example:
- Shake effects for intense shots
- Zoom in/out for dramatic transitions
- Blur effects for smoother clip changes
You can apply these effects at headshot moments or between clips using VN’s FX and Transition options.
Step 6: Professional Color Grading
Color grading can completely transform your montage. In VN:
- Apply filters that enhance the mood (cinematic, dark, or vibrant tones).
- Adjust exposure, contrast, brightness, and saturation.
- Use HSL to fine-tune specific colors (e.g., desaturating background while keeping skin tones natural).
Pro tip: Apply your final color grade to all clips at once using the “Apply to All” option for consistency.
Step 7: Export Your Montage
Once you’re happy with the edit, tap Export. Choose resolution (1080p or higher) and frame rate (60fps recommended for smooth gaming edits). Save it to your device and share on platforms like YouTube, Instagram Reels, or TikTok.
Final Thoughts
That’s it! You’ve now learned how to edit a montage video in VN App with music syncing, slow motion, effects, transitions, and professional color grading. This editing style makes your videos stand out and helps them go viral on platforms like YouTube and Instagram.
If you found this guide helpful, don’t forget to experiment with different effects, music, and styles. The more creative you get, the better your edits will look.
See you in the next tutorial. Stay creative and keep sharing happiness!
💬 Join our WhatsApp Channel for updates!
👉 Click here to join